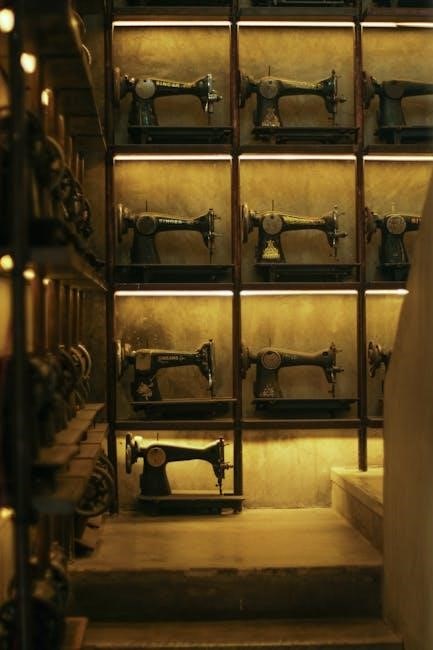
The Singer Handheld Sewing Machine is a portable, user-friendly device ideal for quick repairs and small projects. It’s lightweight, easy to use, and suitable for various fabrics. Perfect for beginners and crafters, it comes with a rotating dial for stitch control and a comprehensive manual for easy operation.
1.1 Overview of the Machine and Its Features
The Singer Handheld Sewing Machine is a compact, portable device designed for versatility and ease of use. It features a rotating dial for stitch control, adjustable thread tension, and compatibility with various fabrics. The machine includes essential accessories like needles, bobbins, and a detailed instruction manual, ensuring a seamless sewing experience for both beginners and crafters.
1.2 Importance of Reading the Instruction Manual
Reading the Singer Handheld Sewing Machine manual is crucial for understanding its operation, safety precautions, and troubleshooting. It provides step-by-step guides for threading, stitch selection, and maintenance, ensuring optimal performance and longevity of the machine. The manual also highlights essential safety tips to avoid damage or injury, making it indispensable for all users.

Safety Precautions and Warnings
Ensure safe operation by keeping fingers away from moving parts and avoiding direct contact with the needle. Always unplug the machine during adjustments or maintenance to prevent accidents and ensure compliance with safety guidelines.
2.1 General Safety Guidelines
Always keep fingers away from moving parts and avoid direct contact with the needle. Ensure the machine is turned off during adjustments or maintenance. Never pull or push fabric while stitching, as this can cause accidents. Regularly inspect the machine for damage and ensure all parts are securely fastened. Refer to the manual for specific safety precautions.
2.2 Precautions for Handling Moving Parts
Exercise extreme caution when handling moving components like the needle and gears. Avoid touching them while the machine is operational. Never force parts to move; if stuck, consult the manual or contact support. Keep loose clothing and long hair tied back to prevent entanglement. Ensure children are supervised when near the machine.
2.3 Electrical Safety Tips
Always unplug the machine before cleaning or servicing. Avoid using damaged cords or plugs. Keep the machine away from water and moisture to prevent electrical hazards. Never operate it near flammable materials. Ensure the power source matches the machine’s voltage requirements. Regularly inspect the cord for wear and tear to maintain safety.
Unboxing and Initial Setup
Gently unpack the Singer Handheld Sewing Machine and accessories, including the needle, threader, and bobbin. Inspect for damage and ensure all parts are included. Place it on a stable, flat surface to begin setup.
3.1 Items Included in the Package
The package includes the Singer Handheld Sewing Machine, a power adapter, extra sewing needles, a threader, a set of bobbins, and a detailed instruction manual. These accessories ensure you have everything needed to start sewing immediately, with clear guidance provided in the manual for proper setup and operation.
3.2 Checking for Damages or Missing Parts
Upon unboxing, carefully inspect the Singer Handheld Sewing Machine for any visible damage or missing components. Verify that all listed items, including the machine, adapter, needles, and manual, are present and in good condition. Report any issues to the seller promptly to ensure a smooth sewing experience from the start.
3.3 Placing the Machine on a Stable Surface
Position the Singer Handheld Sewing Machine on a flat, stable surface to ensure optimal performance. Avoid uneven or shaky areas to prevent vibrations and maintain control. Keep the area clear of clutter for better accessibility and safety, ensuring a smooth and efficient sewing experience with your handheld device.
Understanding the Machine Parts
Familiarize yourself with the Singer Handheld Sewing Machine’s components, including the rotating dial, needle, bobbin case, and power button. These parts ensure smooth operation and precise stitching.
4.1 Main Components of the Handheld Sewing Machine
The Singer Handheld Sewing Machine features a rotating dial for stitch control, a durable needle, and a bobbin case for thread management. It also includes a power button, spindle for thread winding, and a foot pedal for precise control. Additional components like the reverse stitch lever and needle guard ensure safe and efficient operation.
4.2 Diagram of the Machine and Accessories
The diagram illustrates the Singer Handheld Sewing Machine’s key components, including the needle, bobbin case, and rotating dial. Accessories like extra bobbins, needles, and a power adapter are also shown. The diagram helps users identify parts and understand their functions, ensuring proper assembly and operation of the machine for optimal performance and safety.
Threading the Machine
Threading the Singer Handheld Sewing Machine involves carefully guiding the thread through the needle and bobbin case. Proper tension ensures smooth stitching and prevents thread breakage during use.
5.1 Step-by-Step Guide to Threading the Needle
Pull at least 2 inches of thread through the needle from back to front. 2. Insert the thread into the needle eye gently. 3. Guide the thread through the machine’s tension discs. 4. Ensure the thread is seated properly to avoid tangles. 5. Test the tension by gently pulling the thread. Proper threading ensures smooth stitching and prevents breakage during use.
5.2 Threading the Bobbin Case
Insert the thread into the bobbin case’s guide. 2. Wind the thread around the case 2-3 times. 3. Cut the excess thread, leaving a small tail. 4. Pull the thread gently to secure it. Ensure the thread is properly seated to maintain consistent tension. This step is crucial for smooth stitching and prevents tangles during operation.
5.3 Adjusting Thread Tension
To ensure even stitching, adjust the thread tension by turning the small screw on the tension discs. Tighten for thicker fabrics and loosen for delicate materials. Use a screwdriver to gently modify the tension. Test on scrap fabric to achieve the perfect balance. Proper tension prevents loose stitches or thread breakage during sewing. Always refer to the manual for specific guidance.

Operating the Machine
Turn the machine on using the power switch. Use the rotating dial to select stitch type and length. Guide fabric smoothly under the needle for even stitching. Keep fingers away from moving parts. Adjust fabric flow as needed for straight or curved seams. Always turn off the machine when not in use.
6.1 Turning the Machine On and Off
Locate the power switch, usually found on the side or rear of the machine. Ensure the machine is properly plugged in before use. Press the switch to turn it on and begin operation. Always turn off the machine when making adjustments, such as threading or changing the needle, to ensure safety and prevent accidents.
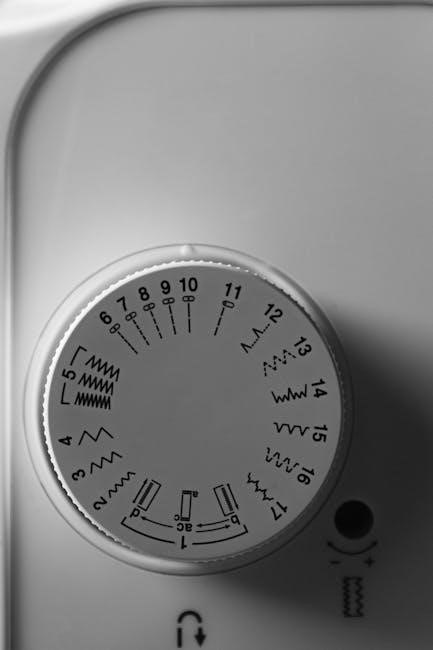
6.2 Using the Rotating Dial for Stitch Control
Locate the rotating dial on the machine’s front or side. Rotate it clockwise or counterclockwise to select from various stitch options. Each position corresponds to a specific stitch type, as indicated on the dial or in the manual. Choose the desired stitch based on your fabric type for optimal results. Always refer to the manual for stitch guidance.
6.3 Basic Sewing Techniques
Start by placing the fabric under the needle, ensuring it’s aligned properly; Gently guide the fabric as it moves under the needle. Keep fingers away from moving parts for safety. Use the rotating dial to select the desired stitch type. Begin sewing slowly, maintaining steady control. Refer to the manual for specific techniques and illustrations.

Stitch Types and Selection
The Singer Handheld Sewing Machine offers various stitch options, including straight stitch and zigzag, suitable for different fabrics and sewing needs. Choose the right stitch type based on fabric thickness and desired seam strength for optimal results.
7.1 Available Stitch Options
The Singer Handheld Sewing Machine features a variety of stitch options, including straight stitch, zigzag, and backstitch, designed for versatility. These stitches cater to different fabrics and tasks, ensuring precise and durable seams. The machine’s rotating dial allows easy selection, making it simple to choose the right stitch for your project needs effectively.
7.2 Choosing the Right Stitch for Your Fabric
Selecting the correct stitch ensures optimal results for your fabric type. Use straight stitches for lightweight fabrics like cotton or silk, while zigzag stitches are ideal for stretchy materials. Heavy-duty fabrics benefit from backstitch for added strength. Always refer to the manual for specific recommendations to achieve professional-grade seams and extend the life of your Singer Handheld Sewing Machine.

Maintenance and Cleaning
Regularly clean the machine to remove dust and debris. Oil moving parts occasionally to ensure smooth operation. Store in a dry place to maintain performance and longevity.
8.1 Regular Cleaning of the Machine
Regular cleaning ensures optimal performance. Use a soft brush to remove lint and debris from the machine’s exterior and internal areas. Avoid harsh chemicals; instead, lightly dampen a cloth for wiping. Pay special attention to the needle area and bobbin case, as buildup can cause jams. Clean after each use to maintain efficiency and extend lifespan.
8.2 Oiling the Machine
Regular oiling is essential for smooth operation. Use Singer Sewing Machine Oil, applying a few drops to moving parts as indicated in the manual. Avoid over-oiling to prevent residue buildup. Oil occasionally, especially after frequent use or DIY projects, to maintain performance and extend the machine’s lifespan. Always turn off the machine before oiling.
8.3 Storing the Machine Properly
Store the Singer Handheld Sewing Machine in a dry, cool place, away from direct sunlight. Use the provided protective cover to prevent dust accumulation. Ensure the machine is turned off and all parts are clean before storage. Keep it out of children’s reach and avoid storing it in humid environments to maintain its performance and longevity.
Troubleshooting Common Issues
This section addresses common problems like jammed needles, thread breakage, and power issues. Refer to the manual for solutions to ensure smooth operation and extend machine longevity.
9.1 Jammed Needle or Bobbin
A jammed needle or bobbin can occur due to incorrect threading or fabric bunching. Turn off the machine, remove the needle, and gently clear debris. Use a screwdriver to release the bobbin case. Ensure proper alignment and re-thread carefully to prevent future jams. Always refer to the manual for detailed guidance.
9.2 Thread Breakage or Tension Problems
Thread breakage or tension issues often occur due to incorrect threading, improper tension adjustment, or using the wrong needle size. Check the thread path, ensure the needle is correctly installed, and adjust the tension dial as needed. Use high-quality thread and compatible needles to minimize breakage. Refer to the manual for tension adjustment guidelines.
9.3 Machine Not Turning On
If the machine fails to turn on, first check the power source and ensure it is properly plugged in. Verify the power switch is functioning correctly and the adapter is securely connected. Ensure the outlet is working and compatible with the machine’s voltage requirements. Consult the manual for additional troubleshooting steps if the issue persists.
Accessories and Optional Attachments
The Singer Handheld Sewing Machine may come with accessories like bobbins, extra needles, and a needle threader. Optional attachments include specialized presser feet for zippers or embroidery, enhancing versatility for various projects and fabric types, while maintaining ease of use and portability.
10.1 Compatible Accessories
The Singer Handheld Sewing Machine is compatible with various accessories, including additional bobbins, replacement needles, and specialized presser feet. These parts enhance functionality and allow for diverse sewing tasks, ensuring optimal performance across different fabrics and projects. Accessories are readily available online or through authorized Singer retailers, making maintenance and customization straightforward for users.
10.2 Using Additional Attachments
Additional attachments, such as specialized presser feet or extension tables, can enhance the functionality of your Singer Handheld Sewing Machine. Always consult the manual for specific installation and usage instructions. Start with simple tasks to ensure compatibility and proper operation. This ensures safety and optimal performance when exploring advanced sewing techniques.

Downloading the Instruction Manual
Visit Singer’s official website or authorized portals to download the PDF manual. Search by model number, follow prompts, and save for easy access to comprehensive guides.
11.1 Where to Find the Manual Online
The Singer handheld sewing machine manual can be found on Singer’s official website or authorized portals like ManualsLib or Sewing-World. Search by model number, such as Singer 935, to access free PDF downloads. Additional resources include Singer’s support page and third-party databases offering comprehensive guides for various models.
11.2 Steps to Download the PDF Manual
Visit Singer’s official website or authorized portals like ManualsLib. Search for your model number, such as Singer 935, and click the download link. Save the PDF to your device for easy access. The manual is free and available 24/7, ensuring you can reference it anytime for operating guidelines and troubleshooting tips.

Tips for Beginners
Start with simple projects like hemming or repairing small tears. Practice on scrap fabric to get comfortable with the machine. Always use the correct needle size and thread type for your fabric. Keep fingers away from moving parts and follow the manual for threading and tension adjustments.
12.1 Getting Started with Your First Project
Begin by practicing on scrap fabric to familiarize yourself with the machine. Start with simple tasks like hemming or repairing small tears. Ensure the machine is properly threaded and the needle is securely in place. Keep your work area clean and well-lit. Use the rotary dial to select the appropriate stitch for your fabric type. Always follow the manual’s guidance for threading and tension adjustments to ensure smooth operation. Avoid pulling fabric forcefully and keep fingers away from moving parts. Starting small will help build confidence and skill, making your first project a success. Refer to the manual for troubleshooting common issues during your initial use.
12.2 Common Mistakes to Avoid
Avoid pulling fabric forcefully, as it may damage the machine or cause uneven stitches. Never touch moving parts or press the needle arm directly. Ensure proper threading and tension to prevent thread breakage. Use compatible needles and avoid sewing over pins. Keep the machine clean to maintain performance. Always refer to the manual for troubleshooting common issues and tips for optimal use.
The Singer Handheld Sewing Machine is a versatile tool for quick repairs and creative projects. Its portability and ease of use make it perfect for beginners. With the manual’s guidance, users can master sewing techniques and explore endless possibilities. Keep practicing to unlock your full creative potential!
13.2 Encouragement to Practice and Explore More
13.1 Summary of Key Features and Benefits
The Singer Handheld Sewing Machine is a portable, user-friendly device designed for quick repairs and small projects. It features a rotating dial for stitch control, a comprehensive manual, and compatibility with various fabrics. Its lightweight design and ease of use make it ideal for beginners and experienced crafters alike, offering versatility and convenience for sewing tasks.