
Safety Precautions and Warnings
Always wear safety glasses and keep loose clothing tied back. Ensure the work area is clean and well-lit. Never operate the saw without the blade guard or splitter. Keep hands away from the blade during operation. Avoid wearing jewelry that could catch on moving parts. Follow all instructions in the manual to prevent accidents and ensure safe operation. Proper safety practices are essential to avoid injury and maintain equipment performance. Always unplug the saw when making adjustments or performing maintenance. Keep children and bystanders away from the work area. Use only approved Craftsman replacement parts to maintain safety standards. Never touch the blade until it has stopped moving completely. Follow proper procedures for handling and storing the saw to prevent damage or injury. Always check for damaged or worn parts before use and replace them immediately. Use a push stick or other safety devices when cutting small or narrow pieces. Maintain a firm grip on materials to prevent kickback. Never reach over the blade while it is in motion. Keep the saw table and fence clean and free from debris to ensure accurate cuts. Always follow the manufacturer’s guidelines for blade installation and alignment. Use the correct blade for the type of material being cut to avoid accidents. Never operate the saw if you are tired‚ distracted‚ or under the influence of substances that impair judgment. Always start with a test cut on scrap material to ensure the saw is functioning properly. Follow all local safety regulations and guidelines when operating power tools. Keep a fire extinguisher nearby and ensure proper ventilation in the work area. Always disconnect the power cord when leaving the saw unattended. Follow proper procedures for handling and disposing of sawdust and debris. Never modify the saw or use unauthorized attachments‚ as this can create safety hazards. Always refer to the manual for specific safety instructions related to your model of Craftsman table saw.
1.1 General Safety Rules
Always wear safety glasses and keep loose clothing tied back. Ensure the work area is clean and well-lit. Never operate the saw without the blade guard or splitter. Keep hands away from the blade during operation. Avoid wearing jewelry that could catch on moving parts. Follow all instructions in the manual to prevent accidents and ensure safe operation. Proper safety practices are essential to avoid injury and maintain equipment performance. Always unplug the saw when making adjustments or performing maintenance. Keep children and bystanders away from the work area. Use only approved Craftsman replacement parts to maintain safety standards.
1.2 Specific Safety Warnings
- Always use the blade guard and splitter for through-sawing operations to prevent kickback.
- Never wear loose clothing or jewelry that could catch on moving parts.
- Keep hands and fingers away from the blade at all times.
- Avoid cutting small or narrow pieces without a push stick or safety device.
- Never touch the blade until it has completely stopped moving.
- Ensure proper alignment of the fence and blade before cutting.
- Use only recommended blades for your Craftsman table saw.
- Never modify the saw or use unauthorized attachments.
- Always unplug the saw when performing maintenance or adjustments.
- Keep children and bystanders at a safe distance from the work area.

Parts List and Identification
Refer to the parts diagram for your Craftsman table saw model number 113.298142‚ 113.298032‚ or 113.298240. Key components include the blade‚ motor‚ fence‚ and miter gauge. Always order parts by the specified catalog numbers to ensure compatibility and proper function. Use the provided parts list to identify and locate each component accurately. This ensures correct assembly‚ maintenance‚ and operation of your table saw. Always consult the manual for specific part numbers and diagrams.
2.1 Key Components of the Table Saw
The Craftsman table saw features essential components designed for precision and durability. The blade is central‚ mounted on the arbor‚ which ensures accurate cuts. The motor powers the blade‚ delivering consistent RPM for various materials. The fence aligns your workpiece securely‚ while the miter gauge facilitates angled cuts. Additional components include the blade guard‚ splitter‚ and anti-kickback pawls‚ which enhance safety. The table provides a sturdy work surface‚ and the height adjustment allows for customized blade positioning. Understanding these components is crucial for effective operation and maintenance of your Craftsman table saw.
2.2 Parts Diagram and Catalog Numbers
Refer to the parts diagram in your Craftsman table saw manual for detailed identification of components. Key parts include the arbor assembly (Catalog #113.298142-01)‚ blade guard (Catalog #113.298142-02)‚ and fence system (Catalog #113.298142-03). The motor housing (Catalog #113.298032-01) and pulley system (Catalog #113.298240-01) are also critical. Use the diagram to locate and identify each part by its catalog number. This ensures accurate ordering of replacement parts. Always cross-reference the catalog numbers with your specific model (e.g.‚ 113.298142‚ 113.298032‚ or 113.298240) to avoid mismatches. The parts diagram is essential for proper maintenance and repair of your Craftsman table saw;
Assembly and Setup
Begin by carefully unpacking all components and verifying the inventory against the parts list. Assemble the stand and attach the table‚ ensuring all bolts are tightly secured. Install the fence and blade guard according to the manual’s instructions. Align the fence with the blade and test its accuracy. Secure the motor and pulley system‚ ensuring proper belt tension. Double-check all connections for stability and accuracy before use. Follow the step-by-step guide to ensure a safe and functional setup of your Craftsman table saw.
3.1 Unpacking and Inventory
Carefully unpack the table saw and all accessories from the shipping container. Lay out all components on a clean‚ flat surface. Check the parts list provided in the manual to ensure all items are included. Key components include the table‚ fence‚ blade‚ motor‚ and stand. Verify that no parts are damaged during shipping. Organize small hardware such as bolts‚ screws‚ and washers to prevent loss. Refer to the parts diagram in the manual for visual identification of each component. Ensure all catalog numbers match the parts list for accuracy. This step is crucial for a smooth and successful assembly process.
3.2 Step-by-Step Assembly Guide
Begin by attaching the stand to the table saw using the provided bolts. Tighten all connections firmly. Next‚ install the motor according to the alignment guide in the manual. Ensure the belt is properly seated and adjusted for optimal performance. Attach the fence and rail system‚ making sure it is square to the table. Mount the blade‚ following the manufacturer’s instructions for proper installation. Connect the power cord and test the saw at a low speed to ensure smooth operation. Once assembled‚ double-check all components for proper alignment and tighten any loose bolts. Refer to the parts diagram for clarification if needed. Always follow the sequence outlined in the manual to avoid errors and ensure safety; Finally‚ perform a test cut on scrap material to confirm everything is functioning correctly before starting your project. This systematic approach guarantees a safe and efficient setup. Proper assembly is crucial for achieving accurate cuts and maintaining the longevity of your Craftsman table saw. Take your time and ensure each step is completed accurately. Avoid rushing‚ as this can lead to misalignment or improper function.
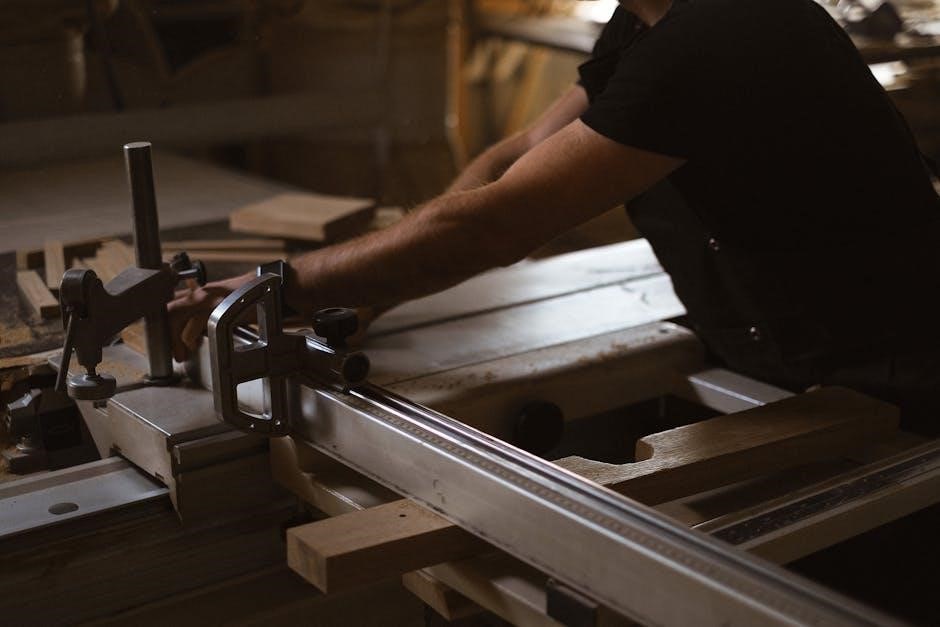
Operating Instructions
Familiarize yourself with the controls and ensure the saw is properly assembled. Turn on the motor and gradually feed material through the blade‚ maintaining steady pressure. Always use the fence for straight cuts and keep the blade guard in place. Avoid overloading the motor and operate at recommended speeds. Keep hands clear of the blade at all times and never reach over it. Use proper lifting techniques to handle materials safely. Follow the manual’s guidelines for blade type and material compatibility. Always start with a test cut on scrap wood to ensure accuracy. Maintain consistent feed rates for clean‚ precise cuts. Keep the work area clear of debris to prevent accidents. Store the saw in a dry‚ secure location when not in use. Regularly inspect and maintain the saw to ensure optimal performance. Always unplug the saw before making adjustments or performing maintenance. Follow all safety precautions outlined in the manual to ensure safe and effective operation. Proper technique and adherence to guidelines are essential for achieving professional results with your Craftsman table saw.
4.1 How to Make Basic Cuts
Start by positioning the wood firmly against the fence. Adjust the fence to align with your desired cut measurement. Lower the blade to the appropriate height‚ ensuring it protrudes slightly above the wood. Use a push stick to guide the wood smoothly through the blade‚ maintaining steady‚ gentle pressure. Keep your hands clear of the blade at all times. For rip cuts‚ feed the wood parallel to the fence; for cross cuts‚ use a miter gauge or sled; Always engage the safety guards and splitter to prevent kickback. After completing the cut‚ turn off the saw and allow the blade to stop completely before handling the wood. Regularly clean the saw table and ensure all parts are well-lubricated for optimal performance. Practice on scrap wood to build confidence and precision.
4.2 Using Special Features
Your Craftsman table saw may include special features like adjustable fences‚ miter gauges‚ or dado capabilities. To make precise angled cuts‚ use the miter gauge and ensure it’s securely locked. For dado cuts‚ install the dado blade set and adjust the width using shims. Always refer to the manual for specific instructions on your model’s features. Some models allow for variable speed control‚ enabling optimal cutting of different materials. Utilize the rip fence for straight cuts and the splitter to prevent kickback. Explore these features to enhance your woodworking projects and achieve professional-grade results.
Maintenance and Tune-Up
Regularly inspect and clean the saw‚ ensuring all parts are in good condition. Lubricate moving components and check alignment. Replace worn or damaged parts promptly to maintain performance and safety.
5.1 Blade Sharpening and Replacement
Sharpen the blade regularly to maintain cutting efficiency. Use an oil stone to hone the teeth‚ ensuring they are evenly sharpened. Rotate the blade backward by hand to access all teeth. If the blade is severely worn or damaged‚ replace it with a genuine Craftsman blade. Lower the blade to the lowest position and unplug the saw before performing any maintenance. Always follow the manufacturer’s instructions for blade removal and installation. Proper alignment and tightening are critical to ensure accurate cuts and prevent accidents. Replace the blade guard and test the saw at a low speed before resuming operation. Keep extra blades on hand for quick replacements; Sharpening and replacing the blade ensures optimal performance and safety. Always prioritize blade maintenance to extend the life of your table saw.
5.2 Motor and Belt Maintenance
Regular maintenance of the motor and belts is crucial for optimal performance. Inspect belts for wear and replace them with genuine Craftsman parts if necessary. To access the motor and belts‚ remove the table or lower compartment. Always unplug the saw before performing maintenance. Clean dust and debris from the motor to prevent overheating. Align the belts properly and tighten them according to the manual’s specifications. Ensure all components are securely fastened. Test the saw at a low speed after maintenance to confirm smooth operation. Proper motor and belt maintenance extends the life of your Craftsman table saw‚ ensuring smooth and reliable performance.

Troubleshooting Common Issues
Check blade alignment if cuts are uneven. Ensure the fence is securely locked and parallel to the blade. Inspect for dull or damaged blades causing poor cuts. Verify motor belt tension for consistent power. Clean sawdust buildup from the table and blade area. Check for loose bolts or misaligned components. Refer to the manual for specific solutions to restore proper function and accuracy to your Craftsman table saw;
6.1 Common Problems and Solutions
Uneven cuts may indicate blade misalignment or a dull blade. Check alignment and sharpen or replace the blade as needed. If the saw vibrates excessively‚ ensure the motor is properly mounted and the blade is balanced. For inconsistent power‚ inspect the motor belt for wear and tighten or replace it if necessary. Kickback can occur due to improper material feeding; always use a push stick for small pieces. If the fence is not parallel to the blade‚ adjust it according to the manual. Lubricate moving parts regularly to prevent friction and maintain smooth operation.
Warranty Information
Your Craftsman table saw is backed by a full one-year warranty covering defects in material and workmanship. Register your product online for extended coverage and support.
7.1 Understanding Your Warranty Coverage
Your Craftsman table saw is protected by a one-year limited warranty covering defects in materials and workmanship. This warranty begins on the purchase date and applies to the original owner only. It does not cover damage caused by misuse‚ abuse‚ or normal wear and tear. Repairs must be performed by authorized service centers using genuine Craftsman parts. To maintain warranty validity‚ ensure proper registration and retain your proof of purchase. Exclusions include damage from improper maintenance or unauthorized modifications. Contact Craftsman customer support for warranty claims or clarification on coverage details.
7.2 How to Register Your Product
To register your Craftsman table saw‚ visit the official Craftsman website and navigate to the product registration section. Provide your contact information‚ purchase details‚ and product serial number. Ensure you have your receipt and model number handy. Registration helps validate your warranty and provides access to exclusive updates and support. Follow the step-by-step online form to complete the process. For assistance‚ contact Craftsman customer service. Registration is voluntary but recommended for warranty verification and future notifications. Keep your registration confirmation for records.
Accessories and Upgrades
Enhance your Craftsman table saw with high-quality accessories like precision blades‚ rip fences‚ and dust collection systems. Upgrades improve performance‚ accuracy‚ and versatility for various woodworking tasks.
8.1 Recommended Blades for Optimal Performance
For optimal performance‚ use a Craftsman 36-tooth‚ 10-inch carbide combination blade‚ ideal for general woodworking. A 40-tooth alternate top bead blade is recommended for smoother cuts. Rip blades with fewer teeth (24-30) are best for fast‚ straight cuts‚ while crosscut blades (40-50 teeth) ensure clean finishes. Dado sets (6-8 inches) are perfect for intricate joints. Always choose blades designed for your material type (wood‚ metal‚ or plastic). Regularly sharpen or replace blades to maintain precision and safety. Proper blade selection enhances accuracy‚ minimizes tear-out‚ and prolongs tool life. Refer to your manual for specific blade recommendations tailored to your model.
8.2 Useful Attachments and Accessories
Enhance your Craftsman table saw’s functionality with practical attachments and accessories. A mobile table saw station provides portability and workspace organization. A rip fence ensures precise straight cuts‚ while a miter gauge facilitates accurate angled cuts. A dado throat plate is essential for creating professional joints. Consider adding a push stick or featherboards for safer material handling. A dust collection system minimizes sawdust and improves visibility. Explore optional attachments like a folding stand or outfeed table for added convenience; These accessories optimize performance‚ versatility‚ and safety‚ helping you achieve professional-grade results in your woodworking projects. Refer to your manual for compatibility and installation details.