
Building a 6-foot picnic table is a rewarding project! Free plans‚ often in PDF format‚ enable you to construct a classic‚ park-style table for comfortable seating.
Overview of the Project
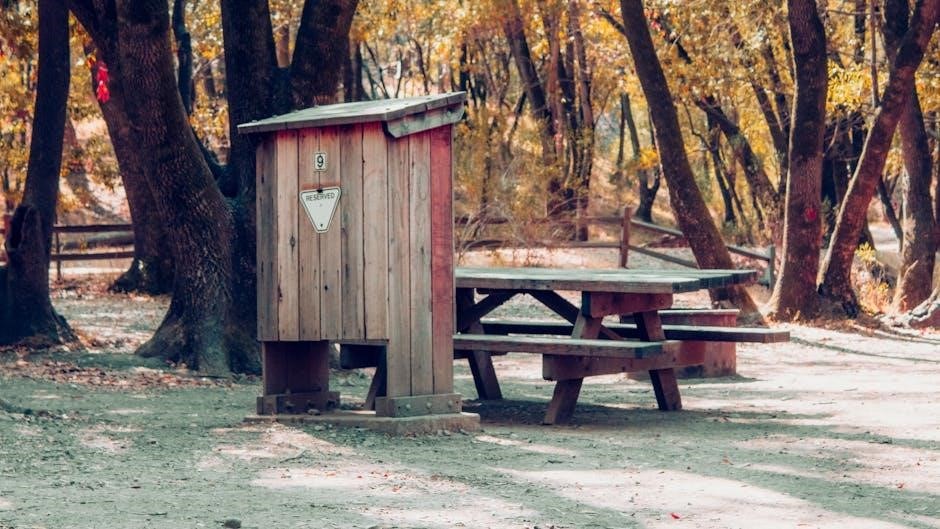
This project centers around constructing a traditional 6-foot picnic table‚ mirroring designs commonly found in parks and lumber stores. Utilizing readily available 2×4 and 2×6 lumber‚ the build is achievable for DIY enthusiasts with basic woodworking skills. Many resources offer downloadable PDF plans‚ providing detailed schematics and dimensions for accurate construction.
The completed table comfortably seats six adults‚ making it ideal for family gatherings or outdoor entertaining. The project is designed to be completed within a weekend‚ focusing on simplicity and cost-effectiveness. PDF plans often include material lists‚ cutting guides‚ and step-by-step instructions‚ streamlining the building process for both beginners and experienced woodworkers.
Why Choose a 6 Foot Picnic Table?
A 6-foot picnic table strikes an excellent balance between functionality and space efficiency. It comfortably accommodates six people‚ perfect for most families and small gatherings. Downloading PDF plans allows for a customized build‚ tailoring the table to your specific needs and aesthetic preferences.
Compared to larger tables‚ a 6-foot model is easier to maneuver and fits comfortably in many backyards. The availability of free PDF plans makes this a budget-friendly project. Building your own ensures quality construction and the satisfaction of a DIY accomplishment‚ offering a durable and inviting outdoor dining solution.

Materials Needed for Construction
Essential materials include 2x4s and 2x6s‚ screws‚ bolts‚ and washers. PDF plans detail exact quantities for a sturdy 6-foot picnic table build.
Lumber Selection (2x4s & 2x6s)
Choosing the right lumber is crucial for a durable 6-foot picnic table. Most plans‚ including those available as PDF downloads‚ recommend using pressure-treated 2x4s and 2x6s to withstand outdoor elements.
Cedar is another excellent‚ naturally rot-resistant option‚ though typically more expensive. PDF schematics will specify the exact lengths needed for each component – tabletop boards‚ leg supports‚ and bench frames. Prioritize straight‚ knot-free lumber for easier assembly and a cleaner finished product. Consider the grade of lumber; a higher grade will reduce imperfections and ensure structural integrity.
Always check for warping or twisting before purchasing.
Fasteners (Screws‚ Bolts‚ Washers)
Secure assembly of your 6-foot picnic table‚ as detailed in PDF plans‚ relies on quality fasteners. Exterior-grade screws are essential to prevent rust and corrosion. PDF schematics often specify screw sizes – typically 2.5” to 3” for joining the 2x4s and 2x6s.
Bolts‚ along with washers‚ are recommended for attaching the legs to the tabletop‚ providing superior strength. Galvanized or stainless steel fasteners are ideal for longevity. Using washers distributes the pressure‚ preventing the bolt heads from sinking into the wood.
Refer to your chosen PDF plan for the precise quantity and type of fasteners needed for each step of the construction process.
Tools Required
Successfully completing a 6-foot picnic table‚ guided by PDF plans‚ requires a basic set of woodworking tools. A circular saw or hand saw is crucial for accurately cutting lumber to the dimensions specified in the PDF schematics. A drill with various bits is needed for pilot holes and driving screws.

Essential tools also include a screwdriver (or drill with screwdriver bits)‚ a measuring tape‚ a square for ensuring right angles‚ and a wrench for tightening bolts. Sandpaper or a sander will prepare surfaces for finishing.
Some PDF plans may suggest additional tools like a level for ensuring a stable table.

Detailed Construction Plans ⏤ Step-by-Step
PDF plans guide you through cutting lumber‚ assembling the tabletop‚ building legs‚ attaching supports‚ and finally‚ uniting all components for a sturdy table.
Cutting the Lumber to Size
Precise lumber cuts are crucial‚ guided by dimensions within your 6-foot picnic table PDF plans. Typically‚ this involves 2x4s and 2x6s. Carefully measure and mark each piece – tabletop boards‚ leg supports‚ and bench components – before cutting.
PDF schematics detail exact lengths for optimal assembly. Ensure square cuts using a saw‚ prioritizing accuracy to avoid wobbling. Double-check measurements against the plans before each cut. Consider a miter saw for angled cuts if your design requires them. Safety glasses are essential during this stage!
Following the PDF’s cutting list minimizes waste and ensures a smooth build process.
Assembling the Tabletop
Refer to your 6-foot picnic table PDF plans for tabletop assembly guidance. Typically‚ this involves arranging the cut 2×6 boards side-by-side; Secure them using 2×4 supports running perpendicular underneath.
Screws are commonly used for this step‚ ensuring a strong and durable connection. Pre-drilling holes prevents wood splitting. Maintain consistent spacing between boards for a uniform surface. The PDF will specify the exact placement of supports.
Ensure the tabletop is square during assembly; a slight misalignment can affect stability. Clamps can be helpful to hold boards in place while fastening.
Building the Table Legs & Support Structure
Your 6-foot picnic table PDF plans will detail leg construction‚ usually from 2×4 lumber. Legs are often built as A-frames for stability‚ requiring angled cuts. Support structures connect the legs‚ providing rigidity and bench attachment points.
Bolts and washers are frequently used for leg assembly‚ allowing for some movement. Braces between the legs enhance strength. Carefully follow the PDF’s dimensions to ensure proper fit and alignment.
Pre-drilling is crucial to prevent splitting when using bolts. Double-check angles and measurements before final assembly for a level and sturdy base.
Attaching the Legs to the Tabletop
Refer to your 6-foot picnic table PDF plans for precise leg placement. Typically‚ legs are attached to the underside of the tabletop using screws or bolts. Ensure the legs are positioned identically for a level surface.
Pre-drilling pilot holes is essential to prevent wood splitting‚ especially with hardwoods. Use appropriate length screws or bolts to avoid protruding through the tabletop. Consider adding corner braces for extra stability.
Double-check alignment before fully tightening fasteners. A secure connection between legs and tabletop is vital for the table’s overall strength and longevity.
Bench Construction
PDF plans detail cutting bench components from 2x4s‚ then assembling sturdy frames. These frames will later attach directly to the 6-foot picnic table.
Cutting Bench Components
Detailed PDF schematics are crucial for accurately cutting the lumber for your picnic table benches. Typically‚ these plans call for using 2x4s for the bench frames and seating surfaces. Precise measurements‚ clearly labeled within the PDF‚ will dictate the length and quantity of each board needed.
Expect to cut pieces for the bench supports‚ the side rails‚ and the actual bench slats themselves. Double-checking these dimensions against the PDF before each cut minimizes errors and ensures a proper fit. Remember to account for the width of your saw blade (kerf) when making your cuts for optimal accuracy. A miter saw is highly recommended for clean‚ square cuts.
Assembling the Bench Frames
Following the PDF plans‚ bench frame assembly usually involves connecting the support pieces and side rails with screws or bolts. Pre-drilling holes is highly recommended to prevent the wood from splitting‚ especially when working with 2x4s. Ensure the frame is square during assembly – a speed square is invaluable for this step.
The plans will specify the screw or bolt size and placement for optimal strength. Pay close attention to these details! Once the frame is assembled‚ check for stability and make any necessary adjustments before proceeding. A sturdy frame is essential for comfortable and safe seating on your finished picnic table.
Attaching Benches to the Table
Referencing your PDF plans‚ carefully position the assembled bench frames beneath the tabletop. Typically‚ this involves aligning the bench supports with the table’s leg structure. Securely attach the benches using bolts‚ washers‚ and nuts‚ ensuring a tight and stable connection.
The plans will detail the precise bolt placement for optimal support. Double-check alignment before fully tightening the hardware. A properly attached bench won’t wobble and will comfortably support seated individuals. Consider adding wood glue to the joints for extra durability before bolting everything together.

Finishing Touches & Considerations
PDF plans often suggest sanding for smoothness‚ followed by wood treatment like stain and sealant to protect your 6-foot picnic table from the elements!
Sanding and Smoothing Surfaces
Before applying any protective finish‚ meticulous sanding is crucial for a professional-looking 6-foot picnic table. PDF plans will emphasize starting with a coarser grit sandpaper – typically 80 or 100 grit – to remove any rough edges‚ splinters‚ or imperfections left from cutting and assembly.
Progressively move to finer grits‚ such as 120‚ 150‚ and finally 220 grit‚ to achieve a beautifully smooth surface. Pay particular attention to edges and corners‚ rounding them slightly for comfort and safety. Thoroughly remove all sanding dust with a tack cloth or vacuum before proceeding to the next step. A smooth surface ensures better adhesion of stains and sealants‚ enhancing the table’s longevity and appearance.
Wood Treatment & Protection (Stain‚ Sealant)
Protecting your newly built 6-foot picnic table from the elements is vital for its durability. PDF plans often recommend a combination of stain and sealant. Begin with a wood stain to enhance the natural grain and add color‚ choosing an exterior-grade stain designed for outdoor use.
Allow the stain to dry completely‚ then apply multiple coats of a clear exterior sealant. This creates a waterproof barrier‚ shielding the wood from moisture‚ UV rays‚ and mildew. Consider a sealant with UV inhibitors to prevent fading. Regular reapplication of sealant‚ as needed‚ will ensure years of enjoyment from your picnic table.
Safety Precautions During Construction
Prioritizing safety is crucial when building your 6-foot picnic table‚ referencing your PDF plans carefully. Always wear safety glasses to protect your eyes from sawdust and flying debris. Use ear protection when operating power tools like saws and drills.
Work gloves will safeguard your hands from splinters and abrasions. Ensure your work area is well-ventilated‚ especially when applying stains or sealants. Securely clamp lumber before cutting or drilling to prevent movement. Be mindful of electrical cords and avoid working in wet conditions. Follow all tool manufacturer’s safety guidelines.

PDF Plan Resources & Downloads
Numerous websites offer free 6-foot picnic table plans in PDF format‚ providing detailed schematics and dimensions for easy construction.
Finding Free 6 Foot Picnic Table Plans in PDF Format
Locating free 6-foot picnic table plans in PDF format is surprisingly easy with a quick online search. Several websites specialize in woodworking projects and offer downloadable plans. These PDFs typically include comprehensive instructions‚ detailed cutting lists‚ and clear schematics‚ making the build process manageable for both beginners and experienced woodworkers.
Popular resources often feature classic designs resembling those found in public parks‚ constructed primarily from 2x4s and 2×6 lumber. Some plans even offer variations‚ such as adding an umbrella hole or incorporating specific design elements. Remember to preview the PDF to ensure it suits your skill level and desired aesthetic before committing to the project. Websites offering these plans often include customer reviews and project photos for inspiration.
Understanding PDF Schematics & Dimensions
PDF schematics for 6-foot picnic tables are crucial for accurate construction. Key dimensions to note include the overall table length (typically 72 inches)‚ width (around 62 inches including benches)‚ and height (usually 29 inches). Detailed plans will label each component with precise measurements‚ ensuring proper lumber cuts and assembly.
Pay close attention to the units used – inches are standard. Schematics often use exploded diagrams‚ illustrating how each piece fits together. Understanding these views is vital. Look for labeled measurements for tabletop boards‚ leg lengths‚ and bench supports. Tariff-free resources often provide these details‚ enabling a successful and enjoyable building experience.

Alternative Designs & Customizations
Beyond traditional styles‚ PDF plans inspire modern designs and features like umbrella holes or built-in cup holders for enhanced picnic enjoyment!
Traditional vs. Modern Picnic Table Styles
Traditional 6-foot picnic table plans‚ readily available as PDF downloads‚ typically mirror the robust designs seen in parks – straightforward construction with a focus on durability and ample seating. These plans emphasize classic aesthetics‚ often utilizing simple lines and readily available lumber.
Modern variations‚ also found in PDF format‚ introduce sleeker silhouettes‚ potentially incorporating angled legs‚ unique tabletop shapes‚ or mixed materials. Some designs prioritize a more minimalist look‚ while others explore bolder‚ contemporary forms. Customization options within PDF plans allow for blending traditional sturdiness with modern flair‚ creating a unique outdoor dining experience.
Ultimately‚ the choice depends on personal preference and the desired aesthetic for your outdoor space.
Adding Features (Umbrella Hole‚ Cup Holders)
Many 6-foot picnic table plans‚ accessible as PDF downloads‚ can be easily adapted to include convenient features. Integrating an umbrella hole requires careful consideration during tabletop construction‚ ensuring proper reinforcement and a snug fit for the umbrella pole.
PDF schematics can be modified to incorporate recessed cup holders‚ adding a touch of convenience for diners. These can be created by routing circular openings into the tabletop and potentially adding plastic inserts for durability.
Remember to adjust material lists and cutting dimensions accordingly when customizing your picnic table plans. These additions enhance functionality and comfort during outdoor gatherings.

Cost Estimation & Budgeting
PDF plans help estimate costs! Lumber (2x4s & 2x6s) is primary‚ with fasteners adding to the total; DIY saves versus store-bought tables.
Material Costs Breakdown
Utilizing 6 foot picnic table plans in PDF format allows for precise material quantification‚ aiding in accurate cost estimation. Predominantly‚ the expense centers around lumber – specifically 2x4s and 2x6s – with costs varying based on wood type (cedar‚ pine‚ or treated lumber).
Expect to spend approximately $80-$150 on lumber alone. Fasteners‚ including screws and bolts with accompanying washers‚ will add another $20-$40. Additional expenses might include wood treatment products like stain and sealant ($30-$60)‚ and sandpaper for finishing.
Cypress wood options‚ as seen in Adirondack chair/table sets‚ are significantly pricier‚ potentially doubling the overall material cost. Thoroughly reviewing the PDF plan’s cut list is crucial for minimizing waste and optimizing your budget.
Potential Savings & DIY Benefits
Employing 6 foot picnic table plans‚ often available as PDF downloads‚ unlocks substantial savings compared to purchasing a pre-built table. Retail prices for similar tables range from $200 to $400 or more‚ while a DIY build can be completed for $150-$250‚ depending on material choices.
Beyond cost‚ the DIY approach offers customization opportunities – adapting dimensions or adding features like umbrella holes. The project fosters valuable woodworking skills and provides a sense of accomplishment.
Furthermore‚ building your own ensures quality control and allows you to select durable‚ weather-resistant materials. Accessing PDF schematics simplifies the process‚ making it achievable even for beginner woodworkers with basic tools.